Monday, July 19, 2010

Un giardino sul davanzale

E' da un po' che non posto una ricetta, ma sarà il caldo e il fatto che ho molto da fare...a mettermi sui fornelli ultimamente proprio non mi va (gia' sento i buuuuu). Mi nutro prevalentemente di frutta (poi postero' anche le immagini di qualche frutto interessante in cui sono incappata ultimamente, frutto dei piu' ridicoli incroci genetici!). Eppure quando ogni mattina al risveglio vedo le nostre piantine crescere rigogliose mi vien da ringraziare il cielo per tutte queste erbette aromatiche che, anche se lontano, mi ricordano i profumi di casa. Ma siii...lo so che la casa si trova dove si trova il cuore ma se il mio cuore e' diviso tra due mondi...le erbette aromatiche non possono far altro che aiutare!
A Washington il nostro appartamento non ha un balcone e la voglia di avere un po' di basilico a portata di mani era tanta che quest'anno il nostro davanzale puo' far invidia all'orticello del vicino. Inoltre essendo al quarto piano non dobbiamo fare a gara con gli scoiattoli. Tra l'altro qui e' vietato mettere i vasi sul davanzale perche' se cadono sono un pericolo, ma dato che di sotto c'e' un giardino e solo occasionalmente c'e' un giardiniere ( e qualche fumatore incallito), abbiamo deciso di correre il rischio! Abbiamo i vasi e i sottovasi in terracotta rigorosamente "Made in Italy" che sono belli pesanti e ogni tanto (come stamattina) uno dei vasetti piu' piccoli in plastica ci vola giu' dalla finestra...ma per fortuna il giardiniere non c'era!
Abbiamo il basilico che e' rispuntato dal rametto rimasto dall'anno scorso! Non lo sapevo, ma se lo tieni all'interno e' una pianta perenne e non annuale. Dobbiamo innaffiarlo ogni mattina e a volte aggiungere quella polverina blu magica che gli da tutti i nutrimenti necessari.
Abbiamo l'origano (che ha letteralmente invaso e ucciso la salvia); ha bisogno di pochissime cure e fa dei fiori carinissimi.
Il rosmarino (che avuto un inverno un po' duro all'interno ma adesso e' di nuovo all'aria aperta e in fase di recupero. All'interno, me mancanza di aria, sviluppa unas specie di muffetta sulle foglie. Una volta fuori e con un po' di polverina blu e' rinato!).
L'alloro, che qui costa una cifra, quest'anno e' raddoppiato di dimensioni e devo trattenere Todd dal potarlo in stile Edward mani di forbici! Prima o poi dovremo potarlo pero' perche' il davanzale e' quello che e'...
Infine la menta, ultima arrivata, dono dello zio Anthony.
Abbiamo provato l'aglio, anche questo dono di Anthony, ma gli uccelli l'hanno sradicato! A proposito, gli uccelli qui si sono divorati le mie Dalie e le Bocche di Leone, nonche' il tronchetto della felicita!
L'anno scorso abbiamo messo i pomodori e anche se non hanno dato frutti, la pianta e' bella e profumatissima.
In bocca al lupo a chiunque voglia provare a fare un giardino sul davanzale!

Monday, June 7, 2010

Costolette di maiale brasate - Braised pork Ribs


Trovate la ricetta originale sul sito "Simply Recipes" scritta da Elise. La ricetta e' facile ma richiede un po' di tempo. O la fate la mattina per la cena oppure va preparata nel pomeriggio per poi servirla il giorno dopo. Considerate 3 ore per il primo giorno (prevalentemente di attesa durante la cottura) e un'ora e mezza prima di mangiarle. L'attesa vale tutta la pena...queste sono le migliori costolette che io abbia mai assaggiato. Ho modificato la ricetta di Elise perche' invece delle costolette di manzo ho usate quelle di maiale, invece del brodo di manzo ho usato quello di pollo, e invece di carote e sedano ho usato le cime di rapa e l'aglio (che gli danno quel non so che di amarognolo che a me piace tanto).
Inoltre ho usato un bel tegame grande col coperchio invece della padella perche' le costolette e il vino e il brodo non mi entravano nella padella.
Insomma, e' il metodo che conta, il resto e' un po' a vostro gusto e a quello che avete nel frigo! Vi do la ricetta cosi' come la scrive Elise ma in italiano e poi fate voi le modifiche che volete.


Costolette di Manzo Brasate

Ingredienti
  • 12 costolette di manzo con l'osso (io ho usato le costolette di maiale)
  • Sale e pepe
  • Olio d'oliva
  • 1 cipolla gialla a pezzetti
  • 1 costa di sedano a pezzetti (io ho usato aglio)
  • 1 carota a pezzetti (io ho usato le cime di rapa)
  • 750-ml di vino rosso
  • 6 tazze di brodo di manzo o di vitello (io ho usato quello di pollo)


Ricetta


1. Accendere il forno a 180 gradi. Salare e pepare le costolette (io ho usato quelle di maiale). Scaldare poco olio d'oliva in una padella o in un tegame grandino che possano andare anche nel forno e a fuoco alto sigillare la carne da tutti i lati, toglierla dal tegame e metterla su un piatto. (Potete anche sigillare le costolette un po' per volta se sono troppe tutte insieme).


2. Aggiungere la cipolla, la carota e il sedano allo stesso tegame e far imbiondire il tutto per circa 5 minuti.(Io ho usato la cipolla, l'aglio e le cime di rapa)

Rimuovere le verdure e metterle da parte. 

Aggiungere allo stesso tegame il vino rosso e grattare dal fondo i residui lasciati dalla carne e dalle verdure. (Io ho

aggiunto anche un rametto di rosmarino e un paio di chiodi di garofano). Ridurre il vino di 3 quarti (circa 15 minuti).


3. Rimettere le costolette nel tegame con il vino, aggiungere il brodo e se necessario aggiungere tanta acqua quanta ne basta per coprire le costolette. Coprire con il coperchio o con l'alluminio e mettere in forno fino a che la forchetta non penetri facilmente nella carne (2 ore o 2ore e mezza).

Aggiungere le verdure e far cuocere per un'altra mezz'ora). Togliere dal fuoco e lasciar freddare. Mettere il tutto in frigo per la notte.

4. Il grasso sarà solidificato in superficie, potete buttarlo usando un cucchiaio. Mettere il tegame, scoperto, sul fuoco per un'altra ora e far ridurre il sughino fino a che non diventa sciropposo di consistenza. Con un cucchiaio mantenete bagnate le costolette e cercate di muoverle ogni tanto per non far bruciare la salsa.

5. MANGIARE!! Ricetta buonissima!


Braised pork Ribs
The original recipe is written by Elise in "Simply Recipes". GREAT JOB ELISE! And thank you for sharing it. I hope you won't mind if I added the link of your recipe to my blog. I know that everybody in Italy would love these ribs!
The recipe is very easy, it just takes some time so either you prepare it in the afternoon and you eat it the following day for lunch or dinner, or you prepare it in the morning and then you can eat it for dinner. It takes 3 hours to get to the step where you can store it in the refridgerator. And then another hour before serving them. The meat falls right off the bone...these ribs are simply delicious!
Instead of the beef ribs I used pork ribs; instead of carrots and celery I used garlic and rappini; and I added some rosemary and cloves to the wine reduction. I guess it really depends on what you have in your refrigerator...the method is always the same and it's awesome!

Thursday, May 27, 2010

IL GELATO SENZA LE UOVA CRUDE

So che molte persone stanno cercando una ricetta per il gelato senza utilizzare le uova crude. Seguite la ricetta del Gelato per gli ingredienti e le quantità.
Avete diverse opzioni:
1) La prima fase e' di montare le uova con lo zucchero per 10 minuti usando un frullino. Effettuate questa operazione a bagno maria, come quando fate lo zabaione. Accertatevi pero' che l'acqua nel pentolino sottostante sia in ebollizione. Le uova si montano bene lo stesso e vengono "cotte" delicatamente con la temperatura dell'acqua a 100 gradi. Procedete poi con il resto della ricetta.
3) Non so in Italia, ma qui in America ci sono le uova pastorizzate. Si trovano nel reparto frigo vicino al latte e alle uova e sono in un cartone (senza il guscio per intenderci). Potete usare quelle, sono state pastorizzate e quindi non correte il rischio di prendere la Salmonella.
2) Potete anche seguire la ricetta della crema pasticcera e utilizzare quella come ricetta per fare il gelato. Trovate una buona base sulla ricetta del gelato pulcino. Poi potete aggiungere cioccolato o liquori vari per dare il sapore che più vi piace.

HOW TO MAKE GELATO WITHOUT RAW EGGS

I know that many people are looking for a Gelato recipe that doesn't call for raw eggs. Follow the recipe of the Gelato in term of ingredients and quantities. You now have few options:
1) The first step is to use a hand mixer and whip the egg with the sugar for 10 minutes until it gets fluffy. Do this part in a bowl that you put on top of a pot filled with water, on top of a stove. You can mix the egg and the sugar while the water is boiling underneath and your eggs will be cooked and still they will become fluffy.
2) Use pasteurized eggs. They are the once that you find in the carton box in the refrigerated section. They are treated in the same way as the milk and there is no danger of getting Salmonella.
3) Use the recipe of a custard (that require flower and no need of cream) and then you can add the ingredients you like: chocolate, liquors...Follow the recipe for the Gelato Pulcino and you'll be ok.

Saturday, May 22, 2010

Pasta Primavera: con fave e pecorino


Ottima ricettina primaverile. Siamo un po' in ritardo con i festeggiamenti del primo Maggio ma come dice Todd...sara' pur primo Maggio da qualche parte nel mondo no?
Vi do la ricetta cosi' come Mariangela me l'ha data perche' e' facilissima da seguire. Ho avuto problemi a trovare la 'nduja. O meglio, l'ho trovata ma vi assicuro che ha lo stesso nome ma non sembra esattamente quello che dovrebbe essere. Allora mi sono buttata sul lonzino piccante che ha preparato Todd e ho aggiunto un po' di peperoncino in piu'. E' venuta buonissima. Le fave che ho trovato sono un po' piccole, niente a che vedere con quegli scafi belli che aveva nonna nell'orto, ma sono buone lo stesso. La pasta che ho usato sembra integrale perche' l'ho cotta nella stessa acqua che ho usato per sbollentare le fave (gli dara' piu' sapore...ho pensato io). Ma le fave hanno tinto l'acqua di rosso. Saranno le fave transgeniche americane o succede anche con le fave italiane?
INGREDIENTI (per 4 persone)
500 gr.di orecchiette pugliesi;
200 gr.di fave fresche sgusciate meglio se piccole;
2 fette tagliate spesse di salame piccante tipo 'nduja calabrese (ma và benissimo qualsiasi altro tipo di salame purchè piccantissimo);
2 scalogni (o 2 piccole cipolle di varietà dolce);
p
ecorino romano grattugiato q.b.;
olio extravergine di oliva.

Scottare le fave in acqua bollente in modo da poter eliminare la pellicina esterna.
Tagliare lo scalogno sottilissimo e farlo dorare in padella con l'olio (abbondante:deve condire la pasta!).
Aggiungere le fave spellate, cuocere per non più di 5 minuti a fuoco medio (gli ingredienti non devono friggere).
Intanto tagliare a cubetti piccolissimi il salame ed aggiungerlo alle fave.
Dopo aver lessato le orecchiette, scolarle e passarle nella padella del condimento: saltare, togliere dal fuoco, spolverare di pecorino grattugiato e...buon appetito!

P.S. Non dovresti avere problemi a reperire gli ingredienti, se così non fosse, scrivi e...seguirà pacchetto mail express!!!


PASTA PRIMAVERA: with fava beans and pecorino (romano cheese)
I give you the recipe for this "spring" pasta as Mariangela, my cousing, gave it. It's easy, fast and delicious. I couldn't find the 'nduja (a spicy Italian salame) and I used the spicy lonza that Todd used but you can use any type of salame, as long as it is spicy. We usually use fava beans and pecorino (romano cheese) to celebrate the 1st of May, that for us is labor day. We are a bit late with the celebration but, as Todd says, it must be the 1st of May somewhere!

Ingredients for 4 people
500 g of orecchiete pasta (De Cecco has it)
200 g of fresh fava beans (better if small)
2 thick slices of 'nduja of Calabria (it's ok also to use any type of salame as long as it is spicy...pepperoni!)
2 chopped scallions (or 2 small red onions that are sweeter than the yellow)
Grated Pecorino (romano cheese)
Extra virgin olive oil

Quickly boil the fava beans. It is easier to remove the skin.
In a pan put some olive oil and the scallions. Let it cook on medium heat until golden and add the fava beans. It doesn't have to fry, it just need to get nice and warm. No longer than 5 minutes.
Cut the salame in small pieces and add it to the pan. In the meantime cook the orecchiette in boiling water, strain it and add it to pan as well. Mix all together so that all the flavors blend. You can add red pepper, black pepper and salt to taste at this point. Plate it grate on top the romano cheese. DELICIOUS!!!!


Monday, May 17, 2010

IL GELATO (senza gelatiera)! No ice cream maker needed!

CARLO! Questo gelato e' tutto per la tua mamma. Se l'e' proprio meritato. Lo so che non lo potete assaggiare, ma lo faremo noi per voi...e' buonissimo! In effetti, Fede, questa ricetta me l'hai data tu ed e' facilissima...sei o non sei la regina del "tutto in 5 minuti?!"
Meno male che a fare Carletto hai avuto piu' pazienza!

Ingredienti (per 2 persone):
1 uovo intero
100 gr panna liquida da montare
1 cucchiaio colmo di zucchero

Sapore: non aggiungere niente e avrete il classico gelato alla crema. Se volete potete aggiungere un cucchiaio di liquore tipo Grand Marnier, Kalua, liquore al caffe', Baileys o liquore al cioccolato tipo Godiva Liquor...oppure cioccolata fusa, o burro di arachidi...insomma quello che volete. Ricordatevi solo che i pezzettini di frutta non vanno bene perche' diventano congelati.

Ricetta:
Montare la panna e metterla in frigo.
Sbattere con la frusta l'uovo e lo zucchero fino a quando diventa montato e diventa bianco (circa 10 minuti).
Unire la panna montata, il cucchiaio di liquore, e mescolare per bene con un cucchiaio. Io questa volta ho messo un cucchiaio di cioccolato fuso e uno di burro di arachidi (il preferito di Todd).
Mettere in frigo e mesorale ogni mezz'ora per 3-4 volte.

Fede e Mauro...CONGRATS!

Piccoli consigli per preparare il gelato in sicurezza:
1) questa ricetta richiede l'uso di uova che non vanno cotte, quindi se gia' state storcendo la bocca...questa ricetta non fa per voi.
2) se, come me, volete fare il gelato comunque perche' siete in crisi d'astinenza (qui ancora un gelato decente lo devono inventare) seguite questi accorgimenti e ricoradtevi che l'uovo, all'interno, e' del tutto sterile e i "pericoli si annidano nel guscio. Comperate uova freschissime. Io mi affido a quelle del supermercato biologiche perche' sono controllate in genere di piu' di quelle non biologiche o di quelle del contadino. Inoltre vengono lavate con potenti detergenti prima di essere messe nei contenitori. Le galline vengono selezionate in modo da essere piu' resistenti alle infezioni da Salmonella che se presente e' sul guscio.
3) Rompete l'uovo senza far cadere pezzetti di guscio
4) Lavorate cercando di mantenere la temperatura di tutti gli ingredienti piu' fredda possibile.
5) Invece di usare le uova crude potete seguire la stessa procedura ma sbattendo le uova a bagno maria come per preparare lo zabaione. In questo modo non avete il problema delle uova crude e il gelato viene buono lo stesso!

IL GELATO (with no ice cream maker)!

CARLO! This ice cream is for your mom. She really deserve it. I know you can't taste it, but we will taste it for you ... it 's really good! In fact, Fede, you gave me this recipe and it's very easy... you're the queen of "all-in five minutes!"
Thank goodness you had more patience in making Carletto!

Ingredients (for 2):
1 whole egg
100 gr whipping cream
1 full spoon of sugar

Flavor: if you don;t add anything you'll get a classic custard-flavored gelato. As an alternative, you can add a spoon of liquor (Grand Marier, Kalua, Baileys, Godiva liquor...) or a spoon of melted chocolate or whatever you prefer. I used a spoon of melted chocolate and a spoon of penut butter. Don't use little piece of fruit because they will freeze.

Recipe:
Whip the cream and put it in the refrigerator. Whip the egg with the sugar until it becomes white and fluffy (10 minutes). Add your flavor and the whipped cream and using a spoon gently mix everything together. Put in the freezer and mix it every 30 minutes for 3-4 times.

Fede and Mauro...CONGRATS!
To prepare gelato safely:
1) if you don't like the idea of using raw eggs, this recipe is not for you!
2) if, like me, you still want to make it because you really miss that great flavor or simply because you want to touch heaven with your tongue...then use only fresh eggs. I use fresh local organic eggs from the store. Remember that the egg, inside, is sterile. Salmonella, if present, is on the shell. The store sells eggs that have been carefully washed. Not only, the chickens are selected to be more resistant to Salmonella.
3) Open the egg avoiding to breake the shell in small pieces.
4) prepare the recipe keeping everhing outside the refrigerator for the shortest time possible.
5) If you really want to cook the eggs, whip the eggs in a bowl on top of another bowl full of water on top of the stove as if you were making zabaione.

Saturday, May 1, 2010

POP OVERS

Vi do una ricetta facile facile che a casa di Todd fanno ogni volta che la famiglia si riunisce, per  colazione. Rebecca, la sorella di Todd, mi ha insegnato che cosa sono i pop overs e come si fanno quando eravamo tutti a casa dei nonni. E' una ricetta facile e anche i bambini possono cimentarsi perche' non c'e' neanche il rischio che si scottino con il forno. La ricetta e' presa, non a caso, dal libro di ricette per bambini "For Good Measure".
Vengono fuori una specie di bigne', ne' dolci ne' salati, quindi ci si puo' sbizzarrire con i ripieni: marmellata, nutella...
E' una di quelle ricette che tornano utili quando hai ospiti all'improvviso e non hai niente pronto da offrire. Servono solo uova, latte (o acqua) e farina, e in mezz'ora sono pronti.
Ingredienti:

1 uovo
1/2 tazza di latte (io uso quello totalmente scremato e se si vuole usare acqua vengono bene lo stesso)
1/2 tazza di farina
Un pizzico di sale

Rompere l'uovo in una ciotola, unire il latte e mescolare insieme. Aggiungere la farina e il pizzico di sale e mescolare. Proviamo ad eliminare i grumi, ma se ne resta qualcuno va bene lo stesso. No big deal! (come direbbero qui). Versare il composto in una teglia per muffin, che avremo precedentemente unto per bene per non farli attaccare, e mettere il tutto  IN FORNO
FREDDO. Accendere il forno a 230 gradi e cuocere per 30 minuti senza aprire mai il forno per sbirciare mi raccomando. Ne vengono 4 o 6 se mettete meno impasto negli stampini. Avrete una simpatica sorpesa quando aprirete il forno...buonissimi i pop overs!

 POP OVERS

This is a very easy recipe that Todd's family makes every time we gather together, for breakfast.
Rebecca, Todd's sister, taught me for the fisrt time what pop overs are and how to make them when we were on vacation with the grandparents. Also a child can make them since there is not even the need to worry about the hot oven. The recipe is taken from a recipe book for children "For Good Measure".
It's an ideal recipe for when you have guests over and nothing in the house to offer. In half an hour they are ready and they are very good!

Ingredients:

1 egg
1/2 cup flour
1/2 cup of milk (I also tried with water or with soy milk and both work)
pinch of salt

Crac the egg into bowl.
Add milk and beat with eggbeater until blended.
Add flour and salt and stir with wooden spoon.
try to get some lumps out, but don't worry if there are few left.
Pour the batter into greased muffin tins, half full and place in cold oven.
Turn to 450 and bake for 30 minutes. Don't peek.
Makes 4.


Monday, April 19, 2010

Il Gelato Pulcino (senza uova crude)

Come tanti altri, anche io e le mie sorelle Silvia e Federica, siamo cresciute con le ricette del mitico manuale di Nonna Papera. Sono tanti i ricordi legati a questo manuale e per questo la tua idea, Sabrine, mi e' piaciuta tanto appena l'ho letta. La prima ricetta a cui ho pensato, senza ombra di dubbio, vedendo il tuo banner e' stata: LE CIAMBELLINE GASTONE. Che buone! Mamma le prepara ogni volta che ci viene a trovare e sono sempre state un successone. Una tira l'altra...ideali per la colazione inzuppate nel latte e ideali per il dopocena inzuppate nel vinello! Apro il manuale (uno dei primi libri che mamma mi ha spedito e che e' arrivato illeso nonostante il pacco fosse stato aperto...il manuale di frate indovino non ce l'ha fatta...ma 'sti ladri postali non capiscono proprio nulla!); dicevo...apro il manuale e lo sfoglio...la ricetta deve essermi sfuggita...lo risfoglio...cerco con attenzione meticolosa nell'indice...chiedo a mamma, a Silvia e a Federica...deve essere li! Insomma, per farla corta la ricetta delle mitiche ciambelline Gastone non e' nel manuale!!! La simpatia per nonna papera deve essere stata tale che le abbiamo ribattezzate con quel nome e prese da qualche altra parte...chissa' se qualcun'altro li fuori ne ha mai sentito parlare?! Mah!
Altra piccola "sudden revelation" e' stata quando ho fatto vedere a Todd, Americano doc, il manuale di nonna Papera. Qui in America nonna Papera non e' molto conosciuta...Todd non si ricorda neanche il nome in inglese...CHE????!!!!!...non solo, Topolino (il giornaletto settimanale che collezionavamo da bambine) qui non sanno proprio che cosa sia...ARICHE??!!! ARIMAH!!!
A questo punto ho la missione di introdurlo al manuale di Nonna Papera...altrimenti e' un buco nell'educazione di Todd e non puo' andare a dire in giro che e' per meta' italiano! La ricetta del gelato pulcino e' stata la piu' adatta al caldo dello scorso fine settimana,ai miei amici e' piaciuto molto. Il risultato e' un gelato alla crema vellutato e rinfrescante. Buonissimo!


Eccola qui, come riportata da nonna:
100g zucchero
4 tuorli
1/2 litro di latte
1 stecca di vaniglia

Come si procede:
E’ questo il classico gelato alla crema. Montate i tuorli con lo zucchero e versateci sopra il latte bollito con la vaniglia, poco alla volta, mescolando. Mettete a cuocere a fiamma viva, ma...attenzione!!! Appena vedrete la crema levare un fil di fumo, abbassate la fiamma e mescolate continuamente. La crema sara’ “cotta” quando la vedrete attaccarsi al cucchiaio di legno. Versate in tazzine e mettetele in fresco.
Io le metto in freezer e le mescolo ogni mezz'ora per 2 ore in modo da rompere i cristalli di ghiaccio che si formano nel frattempo e da dare al gelato la giusta consistenza.

Il Gelato Pulcino (Gelato of the chick) - without raw eggs
Ingredients
100g sugar
4 egg yolks
500ml milk
few drops of vanilla extract

Recipe
This is the classic Gelato custard-flavored. Bring to a boil the milk with the vanilla. Beat the egg yolks with the sugar and add to them the boiling milk, few at a time, stirring. Put on a high flame but...be careful!!! As soon as you see a bit of steam coming up from the liquid, lower the flame and stir continuously. Le custard will be "cooked" when it sticks to the wooden spoon. Pour it in a container and freeze it. Every 30 minutes mix it until it solidifies. MANGIA! MANGIA!


Sunday, April 11, 2010

I RAVIOLI / RAVIOLIS


Let's start with the stuffing
Cominciamo col ripieno


And now let's do the rest!
E adesso facciamo il resto!


Click here to see the video on youtube


Last weekend was a great weekend: we finally made RAVIOLIS! Aunt Carol gave us the recipe and Todd said that these are exactly the same as the once that his "nonnu" would make. I agree, they are delicious. It took us the whole weekend, a lot of energy and 6 people to make them but it was totally worth it. Thanks to Donna, David, Shana and Noah...we would still be there rolling the dough otherwise!
I post the recipe as ant Carol sent it and you can watch the videos for the execution. Awesome weekend everybody!
A huge amount of eggs: we started with 3 dozens and we had to add a couple more (dozen of course!)...a huge amount of meat and parmigiano...a huge amount of work! This is one of those events that we like to share with family members, it's not something that we could make alone. You could of course reduce the amount of the ingredients (as my mom suggested) but it wouldn't be the same. Carol and Lena would make them together and share the raviolis with the rest of the family. They last for several months in the freezer and as soon as they are finished I'm sure it's time to gather the family again and make some more! MANGIA MANGIA!!!!


Ravioli Recipe
Makes approx.: 35 boxes!!!!

Stuffing
 

(make the night before you make the dough)


1 whole chicken fryer roasted 
salt and pepper
2lb. pork roast
1/2lb. butter
1/2 lb. veal stew (we used 1lb here)
1/2 cup oil
1lb. pork sausage
1 piece hard bread about 4’’ soaked in pan juices
2 doz. Eggs
2lbs Kraft Parmesan cheese
3 onions
6 bunches chard (precooked, use stems)
marjoram, rosemary, thyme
1 small bag parsley
10 garlic cloves (grind with the herbs)

Put the meat, which has had salt and pepper added to it, in a roasting pan and roasts it for 1hour @ 350.
Cook the chard, chop it and dry it in the oven until most of the moisture is gone (about 1/2 hour) Grind it and dry it again Be sure to stir it occasionally while it is drying in the oven.
Grind the onion and brown it in a little olive oil.
Grind the herbs and garlic; grind the sausage, pork, chicken, which has been stripped from the bone, and veal into the herbs.
Mix all meats, onion and herbs in a roasting pan with 1 cube of butter. Add 1 cube of butter to the chard. Mix everything together with the olive oil and put it back in the oven. Let the meat cool. Grind the bread and add it to the ground meat.

Add 1 egg at a time, alternate with some of the cheese,
Repeat this until all the eggs and cheese are used. Let this sit in the refrigerator over night.


Ravioli Dough


5 cups flour
5 eggs
2 cups luke warm water
2 Tablespoons olive oil


Measure flour into a bowl, make a well in the flour and add eggs, work the egg into the flour with your fingers, add water a little at a time (you may not need all of it, I only use 1 cup sometimes) Knead the dough and let it rest 1/2 hour wrapped in plastic wrap.


Note: This dough recipe is not enough to use the entire filling up. I usually make 2 or 3 batches.

Using an Altas dough machine. Roll out the dough, which has been cut into quarters, to the desired thickness (4 or 5 on the machine). Be sure to keep the other dough covered until you are ready to use it. Spread some of the stuffing on the bottom dough and cover it with another piece of dough. Using a ravioli rolling pin roll the two pieces of dough together using good pressure so the dough pinches together.
Cut the pillows apart using a ravioli cutter. Sprinkle them with a little Wondra flour and place on a cookie sheet or in boxes lined with wax paper or parchment and sprinkled with Wondra.

E come sempre...in italiano:


Lo scorso fine settimana e' stato stupendo: abbiamo finalmente preparato i ravioli! Zia Carol ci ha dato la ricetta e Todd dice che sono esattamente come quelli che il preparava suo "nonu". Sono d'accordo, sono deliziosi. Ci abbiamo messo tutto il fine settimana per farli, tanta energia e 6 persone in tutto ma ne valeva la pena. Grazie a Donna, David, Shana e Noah...senza di loro saremmo ancora a tirare la sfoglia! Mitico fine settimana!

Una quantita' industriale di uova: abbiamo cominciato con 3 dozzine e poi ne abbiamo aggiunte un paio in piu' (non di uova...di dozzine!)...una quantita' industriale di carne e parmigiano...un sacco di lavoro! Questo e' uno di quegli eventi che ci piace condividere con la famiglia (che culo per loro eh?!), da soli non ce la potremmo mai fare. Certo, si potrebbero ridurre gli ingredienti (come ha suggerito mamma) ma non sarebbe lo stesso. Carol e Lena li facevano cosi' e ne preparavano a sufficienza per tutta la famiglia.


Il Ripieno
(da preparare un giorno prima)


1 pollo allo spiedo
1 kg di arista di maiale
0.5 kg di salsicce
0.5 kg di vitello
250 g burro
mezzo bicch. di olio d'oliva
1 pezzo di pane raffermo da ammorbidire con i succhi che escono dalla carne una volta cotta
6 cespi di bieta
3 cipolle
1 cespo di prezzemolo
10 spicchi d'aglio
maggiorana, timo, rosmarino
1kg di parmigiano
24 uova


Mettere la carne in una teglia, aggiungere sale e pepe, e infornare per un'ora a 180 gradi. Usare i succhi che si formano per ammorbidire un pezzo di pane raffermo che va poi macinato e unito al resto della carne macinata.
Sbollentare la bieta, strizzarla, sminuzzarla e farla asciugare in forno per una mezz'ora mescolandola di tanto in tanto. Tagliare le cipolle a dadini e dorarle in poco olio. Macinare tutta la carne, gli odori, la cipolla, e l'aglio.
Mettere 250g di burro in una grande teglia e aggiungere la bieta, poi tutta la carne e mescolare usando un po' di olio d'oliva. Rimettere in forno per 15 minuti e poi lasciar raffreddare.
Aggiungere le uova una per una alternandole al parmigiano. Lasciar riposare il tutto in frigo per tutta la notte.
Esecuzione dei ravioli: l'impasto

500 grammi di farina
5 uova
Acqua q. b. (aggiungere l'acqua poco per volta fino ad un bicchiere)
2 cucchiai di olio d'oliva


Mescolare gli ingredienti usando un mixer o facendo la fontana. Usare tanta farina quanta e raccoglie. I ravioli hanno bisogno di una pasta abbastanza umida, quindi aggiungere due cucchiai di olio d'oliva e un po' d'acqua fino a raggiungere una consistenza elastica. Avvolgere in pellicola e lasciar riposare per mezz'ora.

Queste dosi non sono abbastanza per tutto il ripieno. Preparane almeno 3 o 4 volte tanto.

Tirare la sfoglia a mano o con nonna papera (fino a 4 o 5). Infarinare lo stampo e stendervi sopra la sfoglia. Mettere il ripieno e coprire con un'altra sfoglia. Con il matterello sigillare bene e capovolgere. Usando un taglia sfoglia separare i ravioli e metterli su carta oleatae infarinata. Cosi' avvolti li abbiamo messi in buste di plastica e congelati velocemente in ghiaccio secco (il nostro freezer e' molto piccolo e non volevamo mettere le buste una sopra l'altra con il rischio che si appiccicassero) e trasferiti nel freezer.
Be', lasciate una busta fuori e cuocetela...dopo tutta la fatica fatta ve li meritate questi fantastici ravioli! MANGIA! MANGIA!


Sunday, April 4, 2010

I RAVIOLI - anteprima/ RAVIOLIS - preview


E' Domenica, sono le 8 di sera e abbiamo appena finito di preparare dai 1158 ai 1728 ravioli: 24 buste con ognuna circa 48 o 72 ravioli (dipende dalle dimensioni)...e' stato un fine settimana epico e vedrete presto la ricetta. Sono troppo stanca adesso per scrivere, ma la foto e' solo un piccolo assaggino. Zia Carol ci ha dato la ricetta e devo dire che questi ravioli valgono tutta la fatica del fine settimana: Sabato il ripieno e oggi la sfoglia e l'assemblaggio finale. Grazie mille a Donna, David, Shana e Noah senza i quali adesso saremmo ancora preparare il ripieno!

It's 8pm of Sunday night and we just finished preparing from 1158 to 1728 ravioli: 24 bags with 48 or 72 ravioli each (depends on the size)...it's been an epic weekend and I'll soon post the recipe. Now I'm too tired to write it down, but the picture is only a small taste of it. Aunt Carol gave us the recipe and I have to admit that these ravioli are worth the whole effort of this weekend: Saturday the filling and Sunday the dough. Thanks to Donna, David, Shana and Noah because without them we would still be preparing the filling!

 E questo e' solo l'inizio: 1kg di arista di maiale, 1/2 kg di salsicce e 1/2 kg vitello...

And this is just the beginning: 2 lb pork, 1 lb sausages, 1lb (actually the recipe called for 0.5 lb) of veal stew

Monday, March 29, 2010

Crispy Waffle with an over night rising dough / I Waffle croccanti


These waffle batter requires to be prepared the night before. Todd usually makes it on Friday night so that we can have a fantastic breakfast on Saturday morning. The waffles are very light, crispy and delicious!

Ingredients;
1 and 3/4 cups of all purpose flour
1/4 cup of corn flour
a handful of yeast
2 cups of milk
1/4 cup of melted butter
1 tablespoon of vanilla
1 tablespoon of orange blossom water

Mix everything together except the eggs. Let it sit overnight. The following morning add the eggs and mix. The batter is ready. It takes more or less 8 minutes to cook the waffles.

Follow the video and MANGIA MANGIA!

By the way, this recipe is taken and modified from the book :"How to cook everything" of Mark Bittman.

I Waffle croccanti e leggeri senza bisogno di impastare
Questa ricetta si prepara la sera prima per una colazione sfiziosa la mattina successiva. Todd di solito la prepara Venerdi' sera e Sabato mattina si gozzovigia con questi waffle accompagnati dalla deliziosa marmellata alle albicocche di mamma e quella di pesche di Ann.

Ingredienti:
1 tazza e 3/4 di farina
1/4 tazza di farina di mais
una manciata di lievito di birra
2 tazze di latte
1 cucciaio di vaniglia
1 cucchiaio di estratto di fiori d'arancio
1/4 tazza di burro fuso

Mischiare tutti gli ingredienti tranne le uova. Lasciar riposare fino al giorno dopo. La mattina aggiungere le due uova e mescolare. L'impasto e' pronto, sulla nostra piastra per waffle ci vogliono 8 minuti.

Seguite il video e MANGIA MANGIA!

Questa ricetta e' stata presa e modificata dal libro: "How to cook everything" di Mark Bittman.

Wednesday, March 24, 2010

Il frittatone con i Carciofi di Gerusalemme / The frittatona with Jerusalem Artichokes

Voleva essere un souffle' ma in corso d'opera si e' trasformato in un frittatone, e siccome e' venuto buonissimo vi do la ricetta. Ero al telefono con Federica, mia sorella, che ha il grande privilegio di avere mamma a casa per qualche giorno...cuoca eccezionale. Gira e rigira, siamo andati a parlare di che? DEL MINESTRONE! Non e' che proprio non mi piaccia, ma non e' il mio piatto preferito, soprattutto se comincio a pensare alle verdure (surgelate) che utilizzerei per farlo. Se proprio devo, preferisco il passato di verdure (non a caso il minipimer ad immersione e' il mio elettrodomestico preferito...dopo big Charlie ed Ercolina...prima o poi ve li faccio vedere). Comunque, dopo questa entusiasmante conversazione con Federica, il senso di colpa per non mangiare abbastanza verdure mi ha assalito! Mi sono quindi ricordata che Sabato scorso io e Todd siamo andati al mercatino biologico e abbiamo comperato una cosa del tutto nuova (per noi): i carciofi di Gerusalemme.

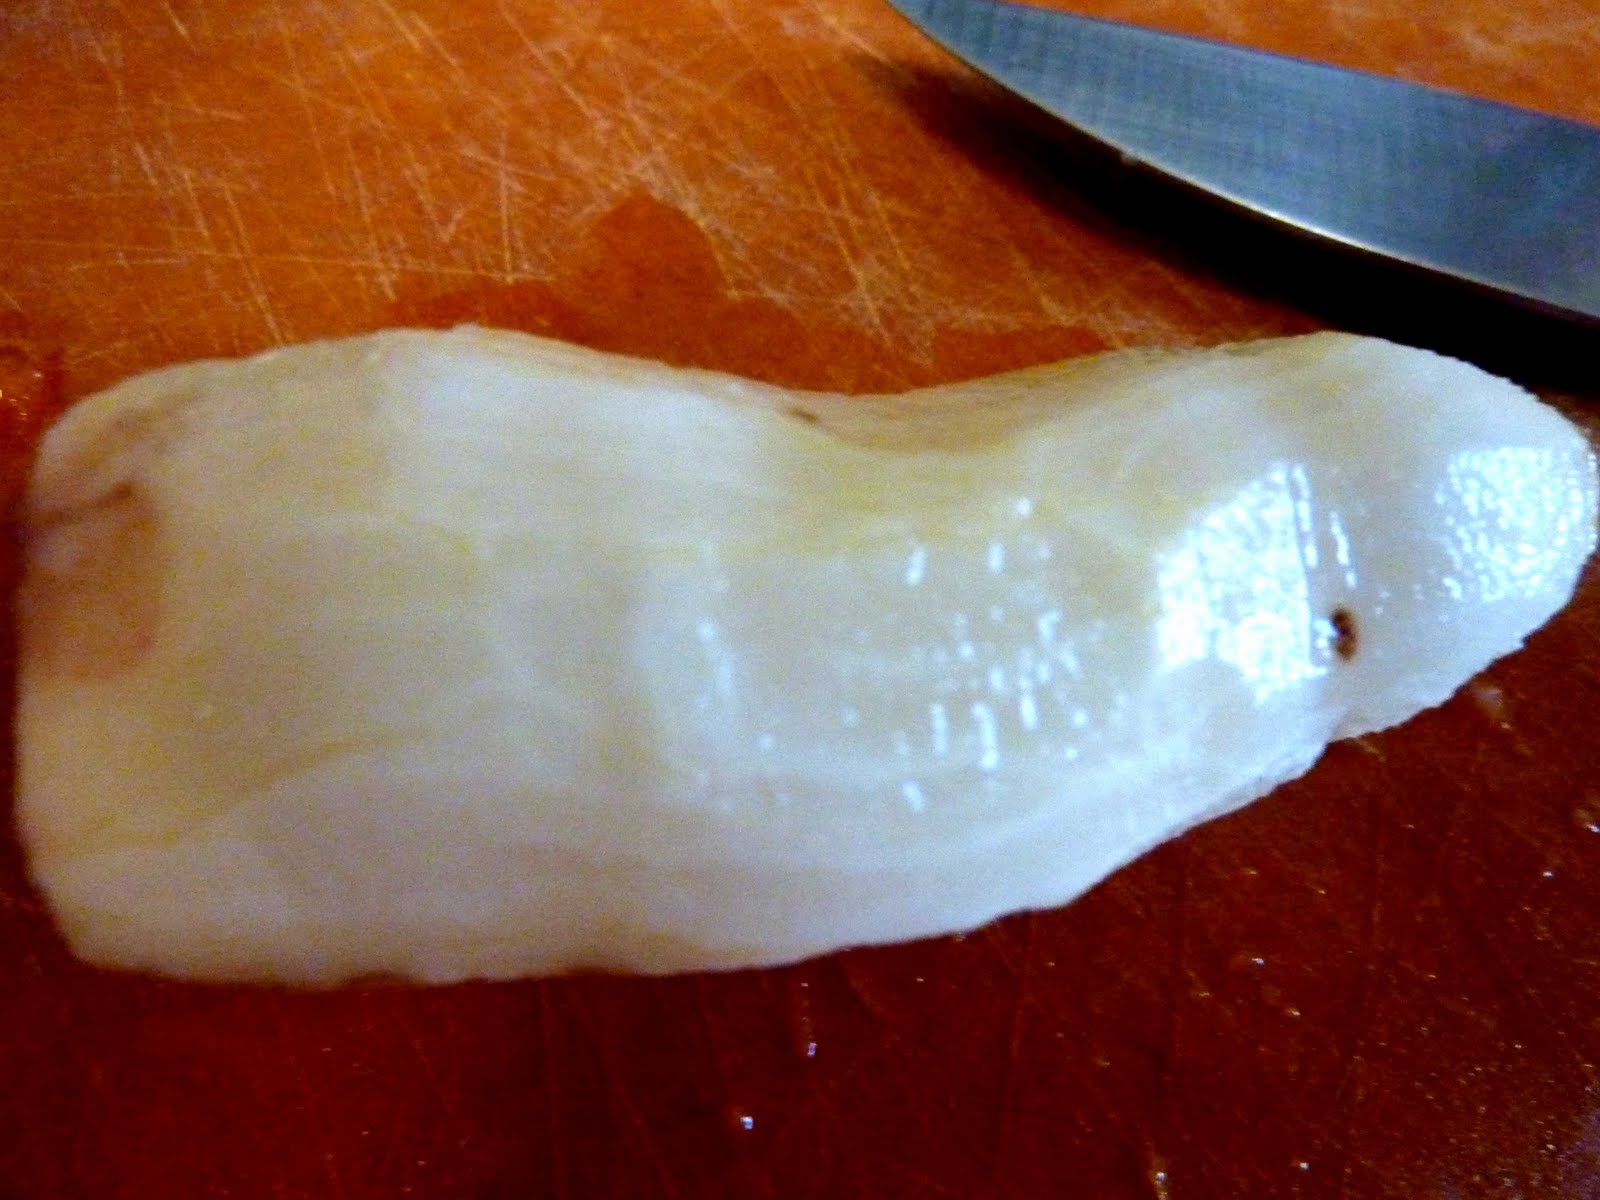
Piccola parentesi culturale (scritta in corsivo perche' la potete anche saltare in tronco se siete piu' interessati al cibo!):
Vengono coltivati un po' ovunque nella costa est degli Stati Uniti e resistono bene al freddo perche' sono sotto terra. E anche quest'anno, con tutta la neve che abbiamo avuto, ce l'hanno fatta! Assomigliano un po' allo zenzero, la consistenza e' quella di una rapa ma il sapore e' simile ad una patata. Ho letto qua e la ed ho trovato che e' la radice di una pianta della famiglia delle margherite. Il fiore e' simile al girasole, e' un po' una margheritona tutta gialla. I carciofi di Gerusalemme vengono anche utilizzati in infusione per fare un liquore che si chiama Topinambur e spesso infatti li chiamano anche Topinambur. Confesso che a me la parola "Topinambur" non e' mai piaciuta quindi se li chiamiamo "carciofi di Gerusalemme" e' meglio.

Insomma, a farla breve, la contadina ci ha detto che di solito si cucinano in zuppe con i porri e le patate, ma lei li taglia a fettine e li frigge in padella. Il suo consiglio e' di prendere delle radici non troppo bitorzolute perche' e' piu' facile pulirle. Si possono semplicemente pulire con una spazzoletta oppure con un pela patate. E poi si affettano a fettine fini e sono pronti per l'uso.


Ingredienti:
1 cipolla tagliata a striscioline
Olio extravergine d'oliva
2 papate medie sbucciate e grattugiate
2 carote pulite e grattugiate
4 o 5 foglie di basilico
2 carciofi di gerusalemme medio/piccoli, puliti e tagliati a fettine sottili
4/5 fettine di salame tagliate un po' spesse e fatte a cubetti piccoli
Parmigiano grattugiato
3 uova - i bianchi in una ciotola e i rossi in un'altra
2 cucchiai di burro
3 cucchiai di farina
un po' di Latte
sale e pepe

Imburrare una terrina (io uso il burro spray, diavoleria americana che ha 0 calorie!) e spolverarla con il pan grattato.
In una padella ho messo l'olio e la cipolla fino a che non appassisce. Ho poi aggiunto le carote, le patate, il basilico, i carciofi di Gerusalemme, i pezzettini di salame. Ho lasciato il tutto cuocere per 10-15 minuti,
aggiustato di sale e pepe e trasferito in una ciotola. Non mi piace cucinare le verdure troppo a lungo, mi piacciono a meta' strada tra il crudo e il cotto, quindi regolatevi voi sul tempo di cottura, assaggiate (e' la parte piu' divertente) e spegnete quando vi piace di piu'.


Nella stessa pentola usata per le verdure (adesso vuota) ho messo il burro e l'ho fatto sciogliere. Quando si vedono le bollicine, aggiungere la farina e mescolare continuamente per 3 minuti. Ho aggiunto poi il latte, abbastanza da far sciolgiere il burro fino a raggiungere una consistenza liquida ma densa (non serve molto latte). In pratica si forma una specie di besciamella un po' liquida.
Far cuocere per un altro minuto e aggiungere i rossi delle uova. Mischiare il tutto.
Spegnere il fornello.
Aggiungere tutte le verdure e il parmigiano.
Battere i bianchi a neve, ben fermi (col mio frullatore ci vogliono un paio di minuti) e aggiungerli al resto degli ingredienti. Con la mano incorporare i bianchi delicatamente. E' divertente e tutto cio' che resta sulle mani puo' essere leccato in sicurezza!

Trasferire il tutto in una terrina e cuocere a 180 gradi per 40 minuti.
L'idea era di fare un suffle', ma dato che ho messo dentro di tutto e di piu', non e' cresciuto molto. E' pero' molto piu' soffice di una classica frittata e il fatto che si cuoce in forno fa mischiare per bene tutti i sapori. In effetti dopo qualche minuto si ammoscia parecchio quindi forse un po' e' cresciuto. Ma che importa giusto?! MANGIA MANGIA!


The frittatona with Jerusalem artichokes

This was supposed to be a soufflé but it quickly transformed in a frittatona (that would be a big frittata), and since it turned out to be great I give you the recipe. I was on the phone with Federica, my sister, that has the great privilege of having my mamma at home with her for few days…marvelous cook. We ended up talking about what? THE MINESTRONE! Is not that I hate it, but it’s not my favorite dish. If I really have to eat it, then I would blend it (it’s not a case that one of my favorite tools is the immersion blender…after big Charlie and Ercolina…sooner or later I’ll show them to you). After this exciting conversation with Federica, the feeling of guilt for not eating enough veggies attacked me! I then remembered that last Saturday Todd and I went to the farmers market and bought a totally new thing (for us): Jerusalem Artichokes!

Short cultural parenthesis (written in italics because you can skip it if you are more interested to the food!): Jerusalem artichokes are cultivated pretty much everywhere in the East coast and they are very resistant to cold climates because they are roots, underground. Even this year, with all the snow that we had, they made it! They look like ginger routs, the texture is the one of the beets but the flavor is similar to the potatoes’. It’s the root of a plant that is in the family of the daisies and the flower is yellow and similar to a sunflower. In Germany they are infused in a liquor to make Topinambur. I confess I’ve never liked the word “Topinambur” so if we call them Jerusalem Artichokes is better!

To make a long story short the farmer told us that usually people cook them with leeks and potatoes to make soups. She likes to clean them, cut them in thin slices and fry them. She suggested buying some that have a simpler shape because it’s easier to clean them. Brush them or use a potato peeler, slice them thinly and they are ready to be cooked.

Ingredients:
1 onion cut in thin slices
Extra virgin olive oil
2 potatoes (medium size) peeled and grated
2 carrots peeled and grated
4 or 5 leaves of basil
2 Jerusalem artichokes, cleaned and sliced thinly
4/5 think slices of salami cut in small cubes
Parmigiano, grated
3 eggs – the whites in a bowl and the yellows in another
2 tablespoons of butter
1/8 cup of flour
¾ cups of milk
Salt and pepper

Take a casserole, grease it with butter (I used Pam, a great American invention that has 0 calories!) and put some bread crumbs on top.
In a pot I put some extra virgin olive oil and the onion and let it go until it becomes golden. I then added carrots, potatoes, basil, Jerusalem artichokes and salami. I let it cooked for 10-15 minutes, added some salt and pepper and transferred in a bowl. I don’t like it when the veggies are cooked for too long; I like them when they are half way between raw and completely done. Well, in this case we have to put them in the oven anyway.
In the same pot (don’t even clean it) I put the butter. Let it melt and when you see the little bubbles add the flour and keep stirring for 3 minutes. Then add the milk and keep stirring for 1 more minute. Add the egg yolks and mix.
Switch off the stove.
Add all the veggies and the parmigiano.
Whip the egg whites until they become very solid (with my blender it takes a couple of minutes). Add them to the rest of the ingredients and mix gently with your hand. It’s going to be fun and whatever is left on your hand can be safely leaked off!
Transfer everything in the casserole and bake it in a preheated oven at 400 for 40 minutes.
The original idea was to make a souffle’ but since there are too many ingredients in it, it doesn’t really rise much. It does get very fluffy compared to a frittata and the smell and the taste are divine. After few minutes it deflates a bit so eat it right away…or not. The thing that matters is MANGIA MANGIA!

Wednesday, March 17, 2010

Il pane di Scali senza bisogno di impastare / Scali Bread no-knead


Il pane di chi??? Questo e' un pane che ho provato a fare sulla spinta di mio suocero David che adora fare il pane e sa quanto ormai io sia affezionata al pane che non si impasta. Forse stanco di mangiare sempre e solo quello, mi ha mandato questo link del sito della "Farina di Re Artu'" (King Arthur's Flour)

http://www.kingarthurflour.com/recipes/scali-bread-recipe.

Ho fatto una piccola ricerca e devo dire che io in Italia di questo pane di Scali non ne ho mai sentito parlare e neanche l'ho mai mangiato! Ho chiesto alla mia famiglia e ai miei amici e nessuno ne sa niente. Ma noi non siamo proprio molto ferrati in tema culinario quindi se qualcuno la fuori ha qualche idea in piu', ben venga. L'unica cosa che so e' che un pane famosissimo a Boston con cui molti italo-americani sono cresciuti per generazioni. E pensare che quando ci sono andata neanche lo sapevo e non l'ho assaggiato!
Dato che come vi dicevo io ormai il pane lo faccio con la tecnica del non impasto, ho provato a fare anche questo cosi' e il primo tentativo e' venuto una mezza zozzeria (come direbbe papa'); il secondo tentativo e' venuto decisamente meglio ma ho avuto una grossa mano da Breadcetera

http://www.breadcetera.com/?p=164


Se cliccate sul link arrivate sulla sua pagina del pane Scali. Andate giu' finche' trovate un'immagine con tre impasti in parallelo. Fate doppio click e il video dovrebbe partire. Il signor Steve vi fa vedere come si intreccia. Tra l'altro si capisce anche di che consistenza dovrebbe essere l'impasto. Due cose che Steve consiglia: prima cosa fare i salamini piu' cicciottelli al centro, seconda cosa dice di ricordarvi questa formula "da destra al centro, da sinistra al centro, da destra al centro..."...per il resto le immagini parlano da sole.

Vi do direttamente la ricetta che ho seguito io senza bisogno di impastare:

3 tazze di farina
1 tazza e mezza di acqua
1/4 di cucchiaino di lievito di birra granulare istantaneo
1 cucchiaino di sale
2 cucchiai di latte scremato in polvere
2 cucchiai di olio extravergine di oliva

Il bianco di un uovo per spennellare la superficie del pane e semi di sesamo (io preferico quelli tostati)

Ho mischiato velocemente tutti gli ingredienti in una zuppiera e aspettato fino al giorno dopo.
Ho preso l'impasto e l'ho rimpastato con tanta farina quanto basta per formare un impasto elastico e non appiccicoso come quello che vedete nel video di Steve. Ho diviso l'impasto in 3 palle uguali e le ho lasciate riposare per 15 minuti (in pratica il tempo di lavare tutte le cose che ho sporcato nel frattempo...non avete idea del casino che combino in cucina!). A questo punto ho seguito il video di Steve e ho preparato una bella treccia. L'ho spennellata con il bianco d'uovo diluito con un cucchiaio di acqua per renderlo un po' piu' liquido e l'ho cosparso dei semi di sesamo tostati.


L'ho messo sullo strofinaccio coperto di farina di mais per non farlo attaccare e l'ho fatto lievitare ancora per un paio di ore. Quando ho visto che il pane era quasi pronto, ho messo nel forno freddo il contenitore per il pane (vi serve un contenitore di ceramica o di ferro battuto CON IL COPERCHIO in cui verrà' cotto il pane), ho acceso il forno a 250 gradi e aspettato mezz'ora. A questo punto il pane può essere infornato nel contenitore bollente e lasciato cuocere per 40 minuti coperto. Scoprire e lasciar cuocere per altri 5 minuti se lo volete più' scuretto. Il sapore e' buonissimo ma quello che mi ha dato piu' gratificazione e' decisamente il profumo. Sara' forse perche' nell'impasto c'è' l'olio? La casa profuma di panetteria...MANGIA MANGIA!
Scali Bread no-knead


Whose bread is this??? I tried to bake this bread after David, my father-in-law, gave me the recipe. He knows how much I love bread and he knows that I like the no-knead bread. Maybe tired to eat always the same bread, he sent me this link to
King Arthur's Flour's web site

http://www.kingarthurflour.com/recipes/scali-bread-recipe

I did a little research and I have to say that when I was in Italy I've never heard about this bread. It sounds Italian...but is not...or maybe it is! I don't know. I only know that in Boston is very famous and many Italian-Americans grew up with it. When I went to Boston I didn't know about it and I didn't try it, too bad. It means that I have to make another trip just for this. Anyway, maybe out there there is some Italian that can teach me more about it??
As I said, I like to make the no-knead bread, so I tried to make this one like that. The first one came out very bad, but the second one was REALLY GOOD, easpecially thanks to Mr Steve in Breadcetera
http://www.breadcetera.com/?p=164
His blog is great and is worth to check it out just because. If you follow te link and scroll down, you can double click on his video where he teaches how to give to the bread the right shape. Also, from the video, you can see the consistency of his dough.

Here is the recipe that I followed:
3 cups of flour
1 and 1/2 cups of water
1/4 teaspoon of yeast
1 tablespoon of salt
2 tablespoons of dry non-fat milk
2 tablespoons of extravirgin olive oil

I mixed everything quickly and let it sit until the next day. I then knided it for some time with more flour until it became elastic and not sticky like the dough that you see in Steve's video. I let it sit for 15 minutes, the time to wash the dishes. At this point follow Steve's video. Add 2 tablespoons of water to the white of one egg, mix it and brush the bread surface. Sprinkle the sesame seeds on top. I baked it in the pot with the lid that I put in the oven for 30 minutes before baking. Set the oven at 400F and bake for 30 minutes. If you like a darker color you can leave it in the oven for other 5 minutes removing the lid. It's a delicious bread and even more...your house will smell like a great bakery! MANGIA MANGIA!